


Whenever you click a label button in a blog which runs on blogger platform, it opens the page with specified URL for that label and you see a default message which says "Showing posts with Label 'Your Label'. Show All Posts". We don't find any method on blogger dashboard to customize or remove this message so in order to perform these functions we will have to make some manipulations in our blogger template. The reason to remove this default message is just that some people consider it an obstacle to give professional look to the blog or they don't like the default message. Our blog itself isn't showing this message for label pages. Before proceeding further I should inform you that you might find different tutorials on removing this message but they don't explain all the effects of applying those methods so this disturb one thing in order to improve another.
In this post we will be covering the functionality of status message in blogger and how to customize it. As I told above, we will have to make some manipulations in blogger template to do this so it is always advised to make a backup of your template before bringing any change in template.
Remove Showing Posts With Label Message:
There are two methods of removing this message. First is adding a CSS rule to hide this message on Label pages and the other method is to completely remove status messages from blog.First Method:
1. Go to blogger dashboard > Template > Edit HTML.
2. Click anywhere inside the template and press CTRL+F. Type ]]></b:skin> in search bar and hit enter.
3. Just below/after this tag, paste the following statement.
<b:if cond='data:blog.searchLabel'>
<style>
.status-msg-wrap,
.status-msg-body {display: none;}
</style>
  </b:if>
4. Click on Save template.
In this method, we have used conditional tag for label pages and this CSS rule indicates that blogger won't display default status message i.e showing posts with label XYZ. Show all posts, in label pages. In this way status messages for other page types aren't effected which include 404 error page and search query page.
Second Method:
Another working method which I have found on many tutorial blogs but I personally don't recommend it because after applying this method we have noticed that not only "Showing posts with label" message is removed from label pages but it deletes status message from 404 and search query pages too. This method is only applicable when you don't want to see default messages on any of the page.Here is the method.
1. Go to blogger dashboard > Template > Edit HTML.
2. Click anywhere inside the template and press CTRL+F. Search for the following tag.
<b:includable id='status-message'>
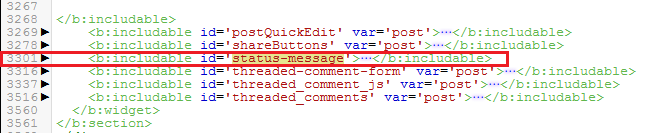
3. You will find a black arrow at left side of this line.
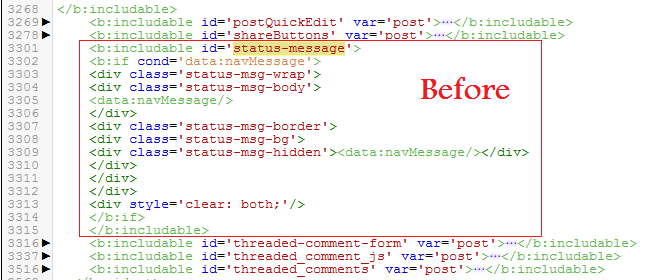
Click on that arrow to expand the whole code which looks like the following.
<b:includable id='status-message'>
      <b:if cond='data:navMessage'>
      <div class='status-msg-wrap'>
        <div class='status-msg-body'>
          <data:navMessage/>
        </div>
        <div class='status-msg-border'>
          <div class='status-msg-bg'>
            <div class='status-msg-hidden'><data:navMessage/></div>
          </div>
        </div>
      </div>
      <div style='clear: both;'/>
      </b:if>
    </b:includable>
4. Replace the whole code with following one.
<b:includable id='status-message'>
<b:if cond='data:navMessage'>
<div>
</div>
<div style='clear: both;'/>
</b:if>
</b:includable>

5. Click on save template and check your label page.
Customize Showing Posts With Label Message:
Changing the text of this message is very easy but the only problem which remains unsolved is that it effects other status messages too as mentioned above so I think there is no need to change that message. Because you might do not want to display a message on your 404 page and search query page that Posts for category XYZ or check posts on label XYZ. It will look awkward so my advise is not to manipulate the message. I am sharing this method for informational purpose only.To change message change the highlighted text with your own text inside below code in template HTML editor.
<b:includable id='status-message'>
      <b:if cond='data:navMessage'>
      <div class='status-msg-wrap'>
        <div class='status-msg-body'>
          <data:navMessage/>
        </div>
        <div class='status-msg-border'>
          <div class='status-msg-bg'>
            <div class='status-msg-hidden'><data:navMessage/></div>
          </div>
        </div>
      </div>
      <div style='clear: both;'/>
      </b:if>
    </b:includable>
Suppose you want to set a message "Check My Work On Category (Your Label) " then replace <data:navMessage/> with the text as seen in following example.
<b:includable id='status-message'>
      <b:if cond='data:navMessage'>
      <div class='status-msg-wrap'>
        <div class='status-msg-body'>
          Check My Work On Category <data:blog.searchLabel/>
        </div>
        <div class='status-msg-border'>
          <div class='status-msg-bg'>
            <div class='status-msg-hidden'><data:navMessage/></div>
          </div>
        </div>
      </div>
      <div style='clear: both;'/>
      </b:if>
    </b:includable>
This example is for informational purpose only and it is not recommended by HelpITx for you.
Customize Layout Of Showing Posts With Label Message:
On the other hand, if you are satisfied from this text and want to change only the layout of this box then you can make changes in CSS of the status message elements. If you have some know-how of web design languages, you might know that CSS is the language which is related to layout and appearance of HTML elements This message is also an HTML element so default CSS for this message is given below..status-msg-wrap {
font-size: 110%;
width: 90%;
margin: 10px auto;
position: relative;
}
.status-msg-body {
text-align: center;
padding: 0.3em 0px;
width: 100%;
position: absolute;
z-index: 4;
}
.status-msg-border {
border: 1px solid #000;
opacity: 0.4;
width: 100%;
position: relative;
}
.status-msg-bg {
background-color: #CCC;
opacity: 0.8;
width: 100%;
position: relative;
z-index: 1;
}
.status-msg-hidden {
visibility: hidden;
padding: 0.3em 0px;
}
You will not find this CSS coding in your template. To make changes in this CSS search for ]]></b:skin> in blogger template editor and just below/after it. Paste the following lines.
<b:if cond='data:blog.search.Label'>
<style>
.status-msg-wrap {
    font-size: 110%;
    width: 90%;
    margin: 10px auto;
    position: relative;
}
.status-msg-body {
    text-align: center;
    padding: 0.3em 0px;
    width: 100%;
    position: absolute;
    z-index: 4;
}
.status-msg-border {
    border: 1px solid #000;
    opacity: 0.4;
    width: 100%;
    position: relative;
}
.status-msg-bg {
    background-color: #CCC;
    opacity: 0.8;
    width: 100%;
    position: relative;
    z-index: 1;
}
.status-msg-hidden {
    visibility: hidden;
    padding: 0.3em 0px;
}
</style>
</b:if>
Change the values of above CSS properties according to your own choice.Best way to make and observe live changes is by using Developer tools in your browser. Be sure to open a Label page of your blog in browser. In Firefox and Google Chrome press CTRL+Shift+I to open developer tools. Then in Firefox for editing CSS click on Style Editor and in Chrome click on sources > Themes > CSS and make observe live changes. That's it.
I have tried my best to explain all aspects of this function in its simplest form. If still you have doubts and concerns you can ask in comments.


Post A Comment:
0 comments: